Creating a Facebook page for your business is free, and according to Facebook that will never change. If you hire someone to make custom graphics for your page that may cost money but if someone tries to bill you just for creating one, say no. Setting up a Facebook business page is not too difficult and I’m going to walk you through it step by step.
Before we get started, you will need to have a personal profile. If you don’t have one, make one. You don’t need to invite others to be your friend or upload a bunch of pictures and you don’t even have to fill in all the information about yourself, but you do need to have one in order to create a Facebook business page.
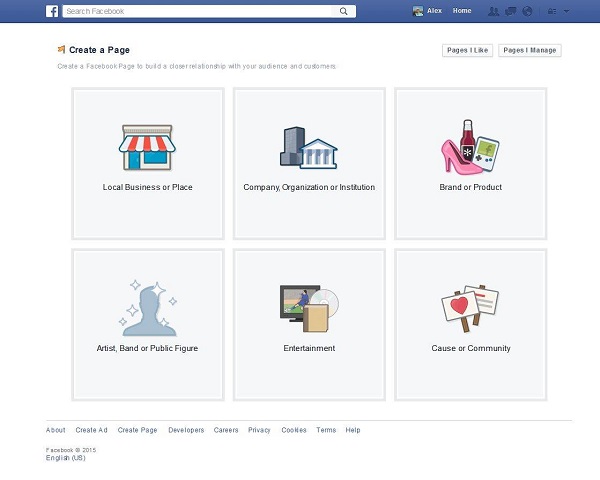
The first step is selecting the type of page you would like to create. After that, select the category within that section that best describes your business. You can look at the different categories on each page type without leaving the page or starting over. If you don’t see the best category for you, feel free to look at the other page types before making a final decision. Most of the potential categories are represented but if you don’t find yours, just select the one that best describes your page. After you select your category, enter your page name (your business name) and click the “Get Started” button that appears. Below is a screenshot of the Facebook page creation section and this link will take you there directly: https://www.facebook.com/pages/create
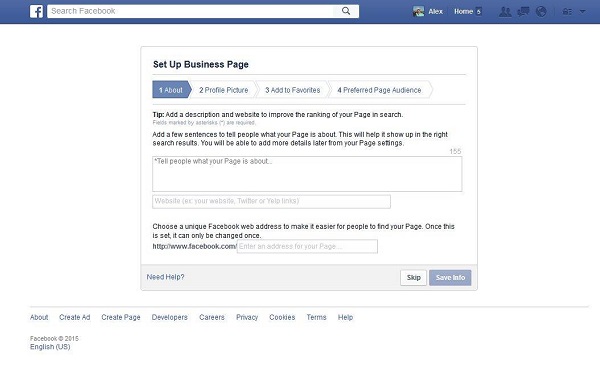
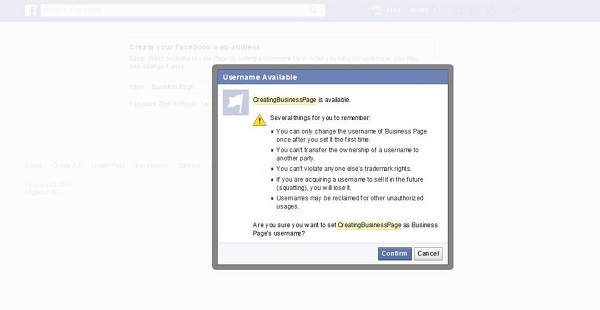
Second, add a few descriptive sentences that best describe your business. This section needs to be short and sweet because your length is limited and you want to get your message across quickly. There is another section later during setup that allows you to write a much longer description, so if it’s not enough room for you, don’t worry. This is also where you add your website link. If you don’t have one yet that’s fine, you can always update the information later when you do get one. During this step you can also choose a unique Facebook web address for your page. This is an important step and the URL you select can only be changed once. You can choose your business name (recommended), an abbreviation of your business name or possibly your product or service (if you only provide one). You may find that the one you want is not available so you might need to select a variation such as adding a period between words or a city/location to the end of your name. We chose to abbreviate our name because it’s shorter. Here is our page URL https://www.facebook.com/TotalMarket. Below is a screenshot of these steps. Please note that sometimes Facebook will not allow you to select a custom URL immediately and if that’s the case, I have provided more instructions later in the article.
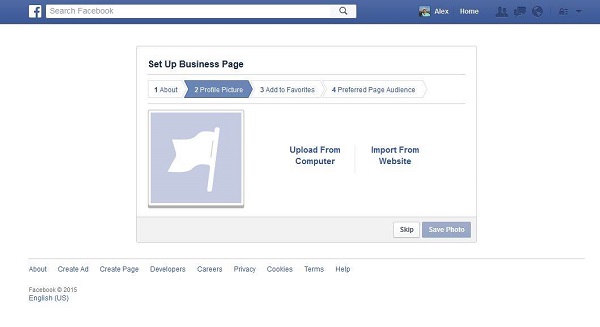
Next, add your profile image. This is the image that will show up next to every post or comment you publish. Profile image must be at least 180×180 pixels and it’s important to remember that minimum image size is not the same as display size. Most businesses will use their logo, or, another great way to add a human element to your page is to use a professional headshot picture of the person who is actually managing the page. Obviously big brands usually do not do this, however, if you’re a small business owner, this may be a good route to choose. Keep in mind that you can change your profile image later if you’re not happy with it. Below is a screenshot of this step.
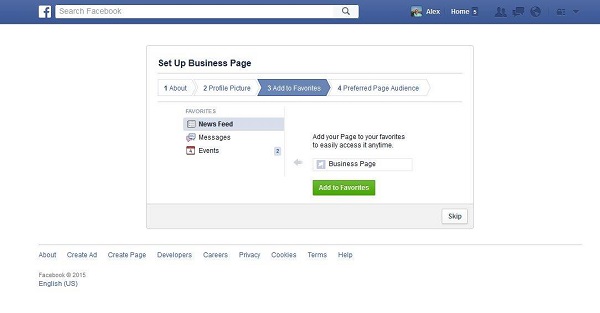
The next step is an easy one. All you’re doing here is adding your new business page to your favorites. Here is what this step looks like.
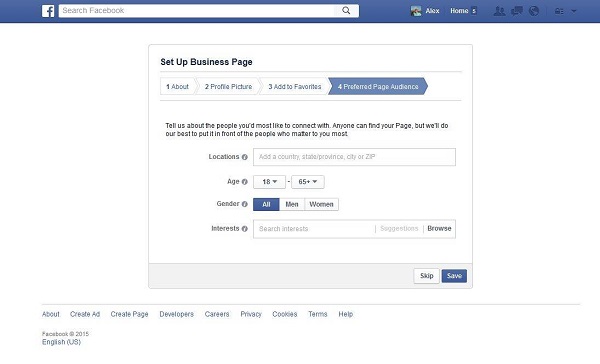
After that, Facebook will request more information about “the people you’d like to connect with.” If you don’t know, that’s OK because you can always click “Skip” and update this information later. If you do know, I recommend you enter a larger geographic location (State or Country) and a wider age range than you think because you never know if someone outside your city or target age could end up being a fan. The “Interests” categories is what I would focus on. If someone has the same interest that pertains to your area of business, things like age and gender should not matter. Below is a screenshot of this step.
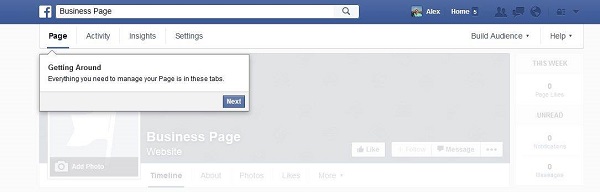
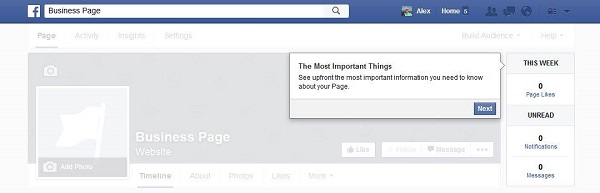
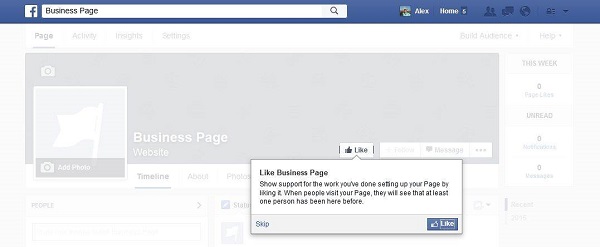
Now that you’ve created a Facebook business page, it’s time to take a short tour of where you can find things like notifications. This will happen automatically and below are a few screenshots of what that tour looks like.
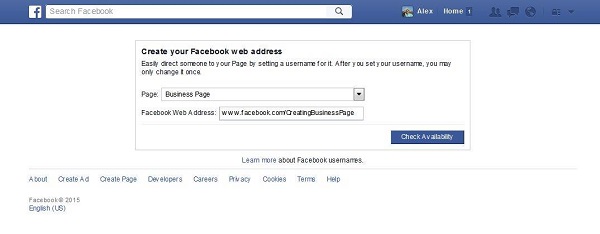
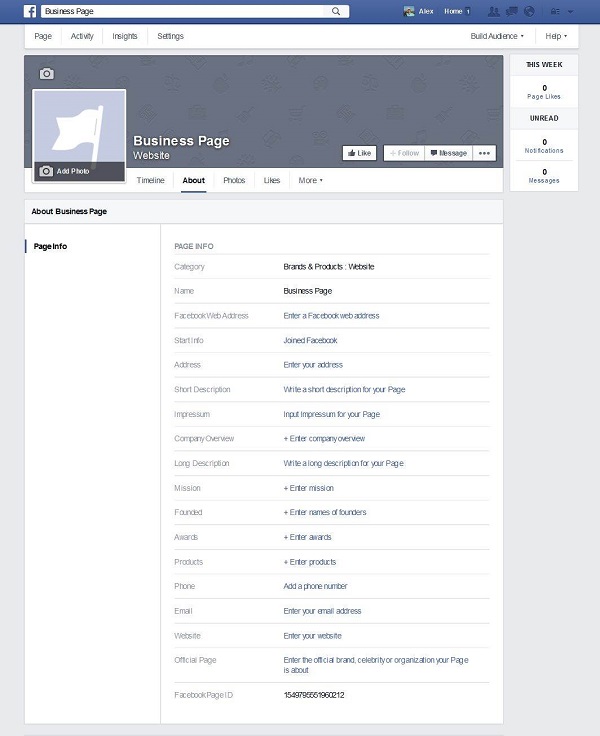
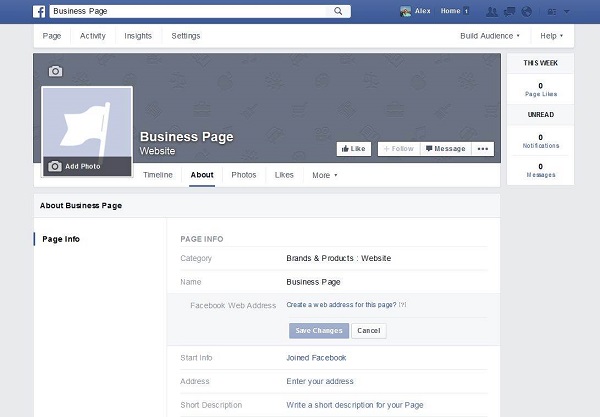
After the brief tour, it’s time to fill in a little more information about your business. Simply click on the “About” tab of your new page and you can edit accordingly. Please note, if Facebook did not allow you to create a custom URL for your page, this is where you can update that. Below are a few screenshots of this section and that step if necessary.
You’re all done! Now that you have a Facebook business page setup, it’s time to learn how to use it properly. Here is a link to 20 Facebook Business Page Tips that will show you how to get the most out of your new page and here’s another link that will show you how to share posts, like and comment as your business page.
Final Thoughts
I hope this article has helped you with creating your very own Facebook business page. Remember that Facebook is always making updates so if something has changed, just roll with the punches and follow the instructions. Now that you’re ready to go, it’s time to make your own. After that, use the links I provided in the paragraph above to learn how to use it.
Thanks for reading and stay tuned for more Facebook tips.
Resources:
Facebook Marketing and Advertising Management
20 Facebook Business Page Tips
How to Share, Like & Comment as Your Business Page
Tags: Facebook, Facebook Business Page, Facebook Page Tips, How To